Ελληνικα
 English
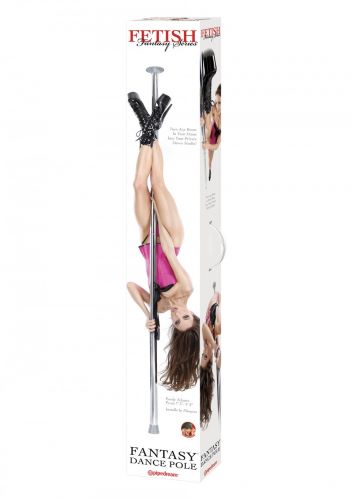

Fantasy Dance Pole
€199.00
In stock
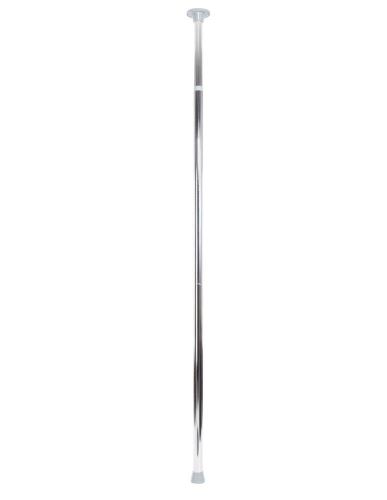
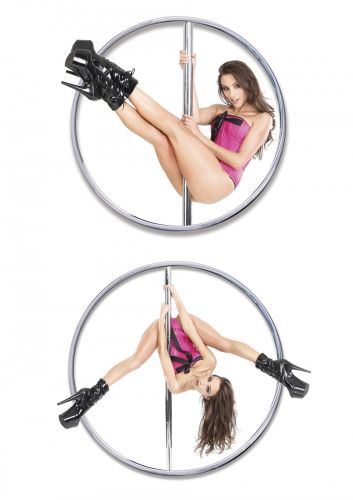
You are the star and your room is the stage to act out your most erotic fantasies! With the Fantasy Pole set up in the comfort of your own home, you can have intimate, one-on-one private striptease sessions for you and your loved one to enjoy. You’ll both love how easy the pole is to use and with practice, you’ll be seductively moving and twirling around the pole in no time. The pole height is fully adjustable and includes everything you need to instantly transform any room in your home into your own private fantasy dance studio.
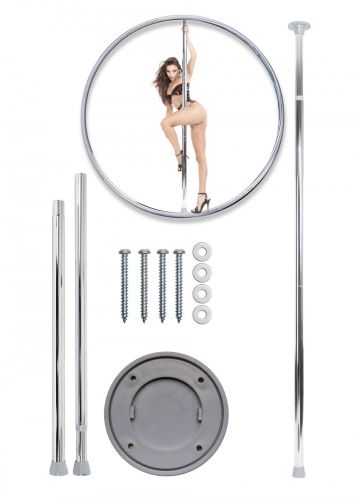
Includes:
Chrome plated Steel pole
Support arm
4 Screws
4 washers
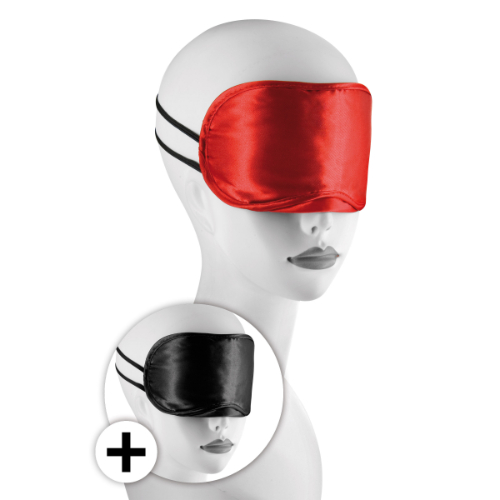
Free Satin Love Mask
ASSEMBLY INSTRUCTIONS (See related graphic in photo area): The heavy-duty stainless steel pole is easy to install and assembles in minutes. The only tools necessary for installation are a ladder, a power drill or screwdriver, and a nail finder. The Fantasy Dance Pole was designed for installation on almost any flat ceiling and uses a sturdy bolt-on base. Vaulted ceilings, acoustic ceilings and false ceilings are not recommended. Always check the durability of both the floor and ceiling before installation to ensure sturdiness and safety. If you are unsure about installing the post yourself, contact a qualified technician to ensure proper installation.
DIMENSIONS:
Expandable: 2.15 cm to 2.80 cm high
MATERIAL: Steel
Description
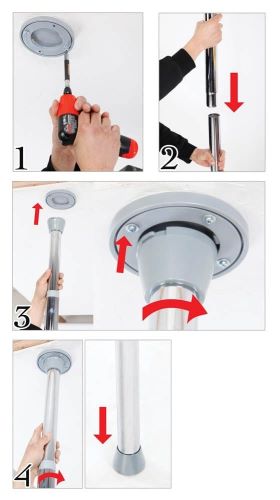
Figure 1: Before you begin, locate a ceiling joist on your flat roof using a stud finder. Once you have located the roof beam, place the support plate on the roof and screw in the (4) screws provided. Make sure the washers are placed on the screws first, then drill the screws into the ceiling to securely attach the mounting plate.
Figure 2: Next, connect the long pole to the short pole by twisting the steel tubes together until tight. Make sure the gray rubber slider is on the pole closest to the roof and the rubber plug is facing the ground. The length of the pole can be adjusted between 7’3½-9’3½, so measure your ceiling first to make sure the pole can fit.
Figure 3: Lift the pole up to the support plate on the roof and place it in the opening of the coupling plate. Rotate the post clockwise until it locks into place on the ceiling support plate. You are now ready to adjust the height of the post using the built-in spring inside the extended post.
Figure 4: Rotate the post clockwise until the non-slip rubber stopper is firmly attached to the ground. With each clockwise rotation of the pole, the length of the pole is extended, making it tighter and more stable with each rotation. When you can no longer twist the post, the post is ready for testing. Make sure the pole is perpendicular to the ceiling and test the pole for tightness and stability before use.
Once you are sure that the post is installed correctly, you are ready to test it.
Related product(s)